Recently I was working on used case where we need to make the custom form dynamics in VRA 8 . Dynamic custom forms ease the job because we do not need to hard code everything .
There are multiple ways to do this like you can use JavaScript which is being used in vro from long time
or
You can use Python and Utilize Rest API calls , Python support is added in VRA 8 design along with PowerCli.
I will be covering PowerCli language for the dynamic selection for Cluster, network and Folder
Now lets look at Yaml side configuration which is required
formatVersion: 1
inputs:
  newVMName:
    type: string
    title: NewVMName
  Cluster:
    type: string
    title: Enter Cluster
  Network:
    type: string
    title: NetworkPortGroup
  Application:
    type: string
    title: Choose Application
  Sub-Application:
    type: string
    title: Choose Sub-Application
resources:
  Cloud_vSphere_Machine_1:
    type: Cloud.vSphere.Machine
    properties:
      newVMName: '${input.newVMName}'
      abxaction: 'yes'
      image: VMwareCode-CentOS
      flavor: VMwareCode-small
      folderName: '${"VRM/" + (input.Application) + "/"+ (input.Sub-Application)}'
      constraints:
        - tag: '${input.Cluster}'
      networks:
        - network: '${resource.Cloud_vSphere_Network_1.id}'
  Cloud_vSphere_Network_1:
    type: Cloud.vSphere.Network
    properties:
      networkType: existing
      constraints:
        - tag: '${input.Network}'
As we see in highlighted row , I am taking input of 4 inputs which we will be using in custom form and I am using tags to force those values
To make the tagging work ,I have assigned same tag name as object l


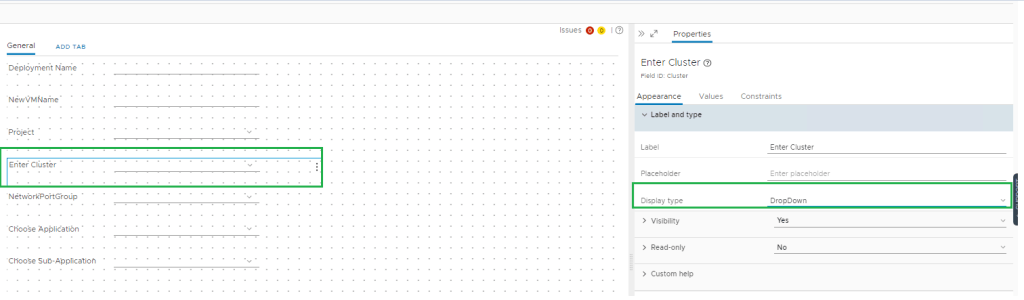
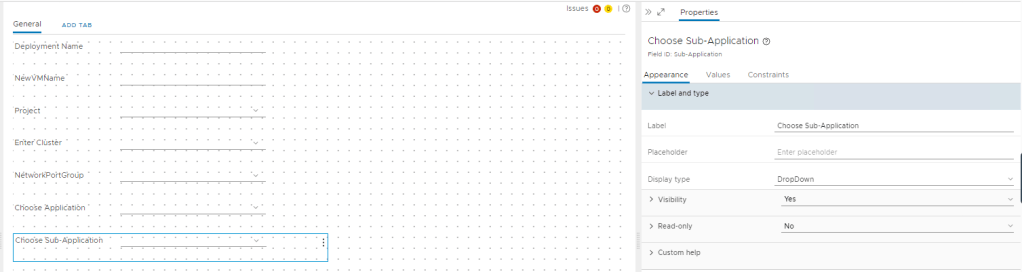
Before I jump to VRO side. lets take a look how my Custom form looks like.

Lets have a look PowerCli vro Action first ,Later we will see the mapping in custom form.
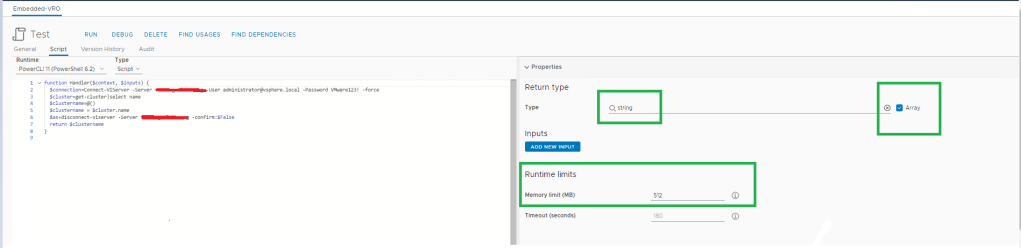
function Handler($context, $inputs) {
  $connection=Connect-VIServer -Server vcsa.vmwarecode.com -User administrator@vsphere.local -Password VMware123! -force
  $cluster=get-cluster|select name
  $clustername=@()
  $clustername = $cluster.name
  $as=disconnect-viserver -Server vcsa.vmwarecode.com -confirm:$False
  return $clustername
}
Either you can use the admin account or Service Account which has admin rights
Once we create action lets jump to custom form and Map the above created action .
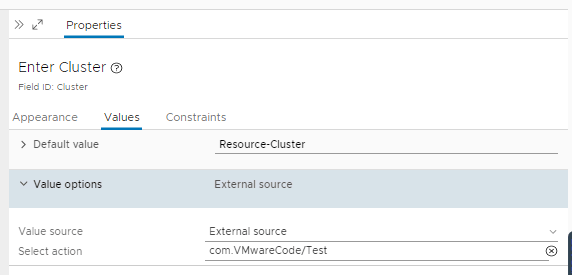
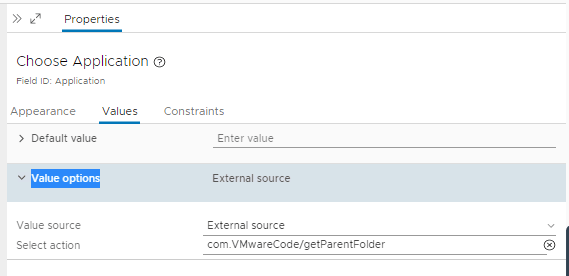
In default value section I have given one of the cluster name and Value source I have set as External Source.
Since we have chosen string of array in vro and drop down in custom form , when you search for action name you will see it will reflect there
Note: com.vmwarecode/ is my Package name where I have saved all my actions, It will be different for you.
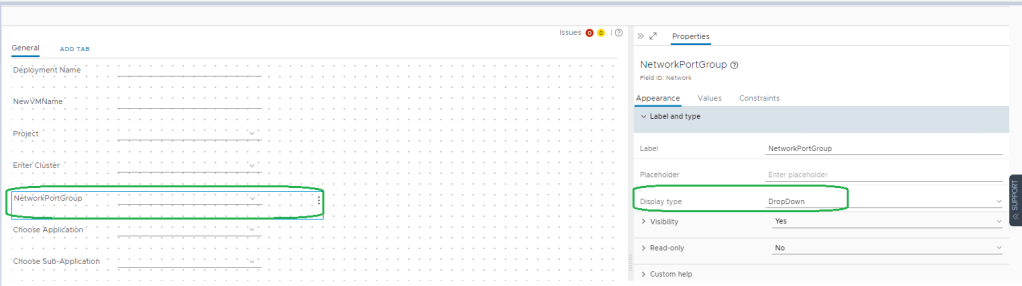
Now next task is chosen the Network Port Group based on Cluster name.
Lets have a look how does network portgroup looks like in Custom form
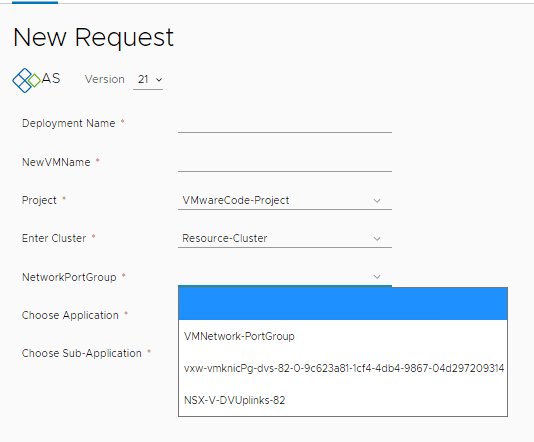
As you see in above screenshot , for NetworkPortGroup field the drop down is coming and those values are based on Cluster which we chose in last above step.
Lets take a look at VRO action for this one.
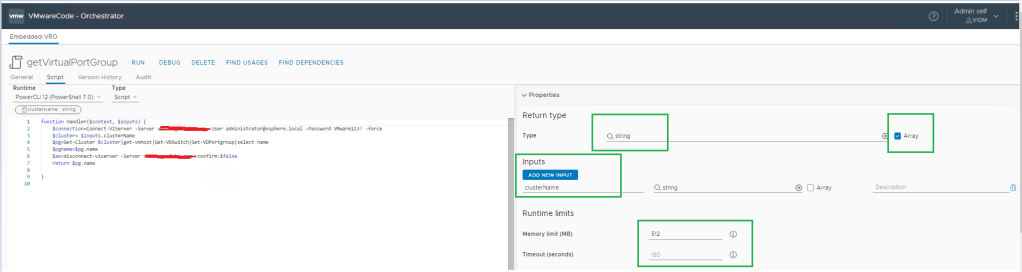
function Handler($context, $inputs) {
    $connection=Connect-VIServer -Server vcsa.vmwarecode.com -User administrator@vsphere.local -Password VMware123! -force
    $cluster= $inputs.clusterName
    $pg=Get-Cluster $cluster|get-vmhost|Get-VDSwitch|Get-VDPortgroup|select name
    $pgname=$pg.name
    $as=disconnect-viserver -Server vcsa.vmwarecode.com -confirm:$false
    return $pg.name

}
As we see we are taking input for the clusterName then getting the Portgroup mapped to ESXi host which are mapped to cluster.
Once vro action is configured ,Lets have a look at Custom form settings.

Also we are using Canvas field and mapping with Enter cluster field from canvas.
Now next task is choose the Folder name dynamically where VM will be provisioned .
Before we start coding for Folder , lets review the current architecture of Folders in vCenter.
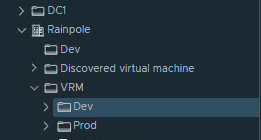
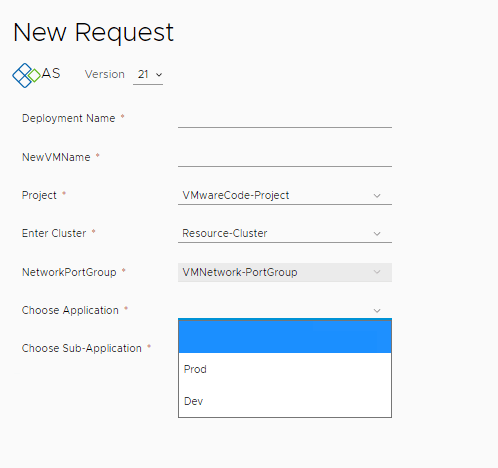
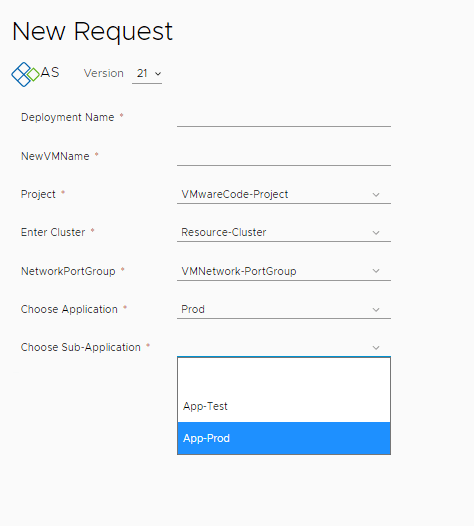
As we can see in above screenshot , we have Main Folder Called VRM. Under that I have 2 Sub Folder called Dev and Prod
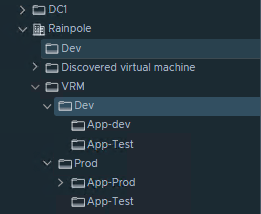
Under Dev I have 2 more sub folders called App-dev and AppTest
Under Prod I have 2 more sub folders called App-Prod and App-Test.
If we noticed we have same sub-folder named called App-Test in Dev and Prod Folder
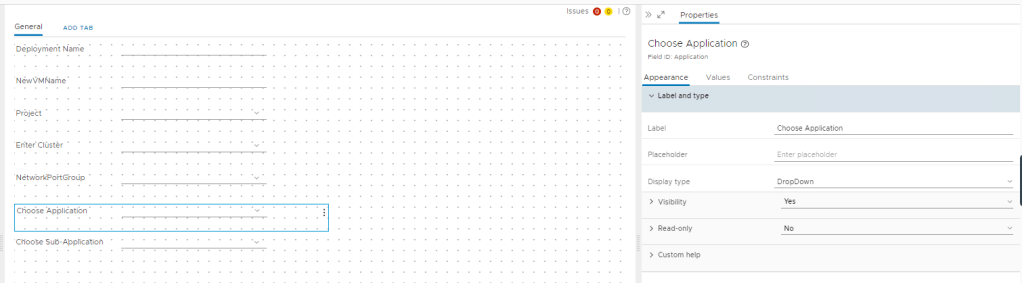
Now lets have a look at folders in Custom form.
Lets look at VRO actions for both fields one by one.
Lets look at choose application vro action which is named as getParentFolder

function Handler($context, $inputs) {
    $connection=Connect-VIServer -Server vcsa.vmwarecode.com -User administrator@vmwarecode.com -Password VMware123! -force
    $foldername=Get-Folder|?{$_.Parent -match "VRM"}|select Name
    $connremoved=Disconnect-VIServer -Server *  -Confirm:$false
    return $foldername.name
}
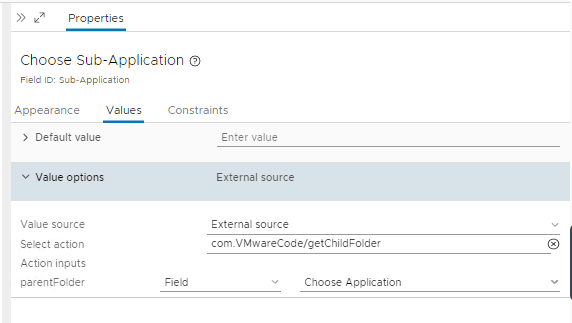
Lets look at Choose Sub Application VRO action.

function Handler($context, $inputs) {
   $connection=Connect-VIServer -Server vcsa.vmwarecode -User administrator@vmwarecode.com -Password VMware123! -force
   $as=$inputs.parentFolder
   $folder=Get-Folder|?{$_.Parent -match $as}|select Name
   $connremove= Disconnect-viserver -server * -confirm:$False
   $foldername=@()
   $foldername=$folder.Name
   return $foldername
}
VRO actions are completed here , lets jump tp custom form for folder.
Here is the configuration for Sub-Application field.
Caution: As this is lab environment ,Here we are entering the Username and Password inside the action .
It may conflict with security concern of your organization if any.

One response to “How to utilize VRO PowerCli actions to make the VRA custom form dynamics for cluster, network and Folder in vRealize Automation 8”
[…] How to utilize VRO PowerCli actions to make the VRA custom form dynamics for cluster, network and Fo… by Ankush (@ankush11s) India […]
LikeLike