Recently I was working on scnerio where we need to provide the sequential names for virtual machine.
when I try to use the project property and read the documentation sequential naming is not expected .
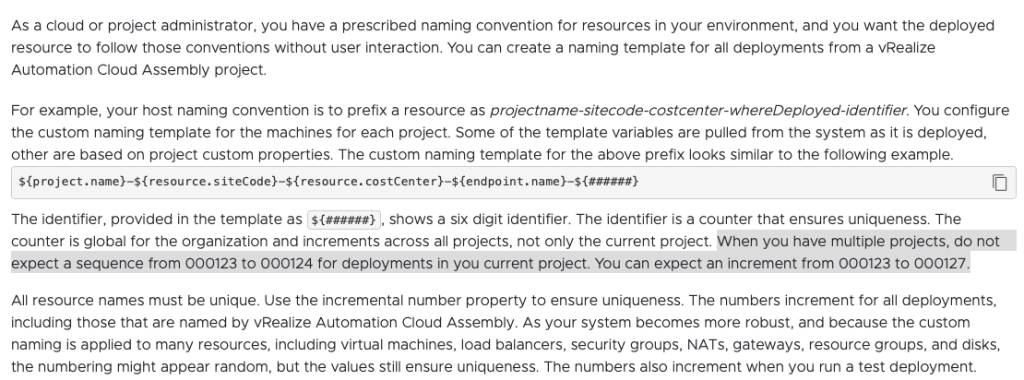
Here is document which I referred
I have written actions/workflows in Python which can fulfil not only the sequential VM names , when we delete the vm ,Names will be release and It can be re used .
How do we get started …
There are some prerequisite which we need to fulfil .
- Download the package.
- Unzip the package
- Import the package
- Set the values to configuration elements as per your Environment.
How to Import the package in vRO…..
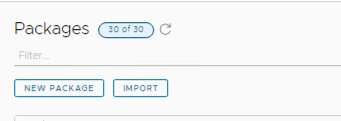
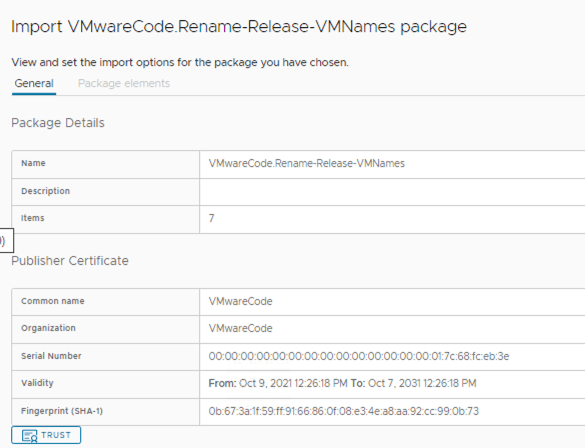
Click on Assets => Packages => Import .
Click on trust and Accept the certificate and import .
Once the import is completed , Navigate to configuration element ,look for VMwareCode folder and you will see passwords CE. Provide all the details as per your environment.
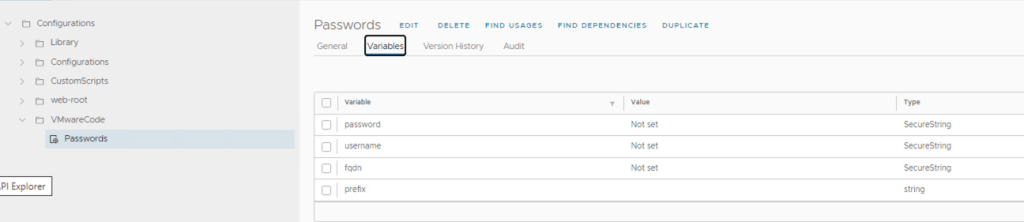
Here Prefix means which prefix you would like to give to VMs , I am giving VMwareCode for example.

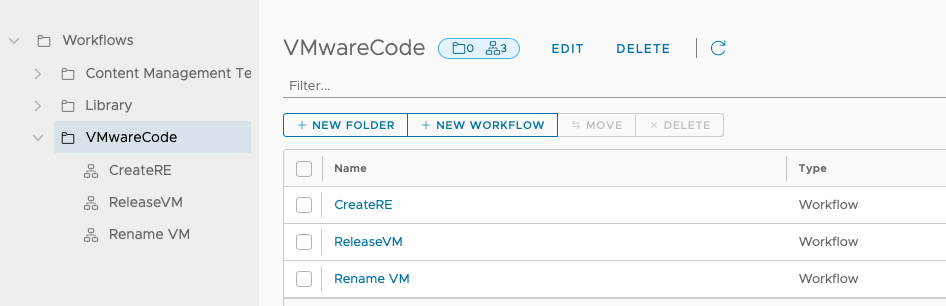
Once this is done, go to workflows and look for VMwareCode folder and you will see 3 workflows.
Click on First workflow CreateRE = > Variable
Provide the sequence start number and End Number. In my case start value is 1 and end value is 100.

Once Done , Click Run on CreateRE workflow and you will see Resource element is created, Here is the output looks like in workflow.

Now Click on Resources under Assest.

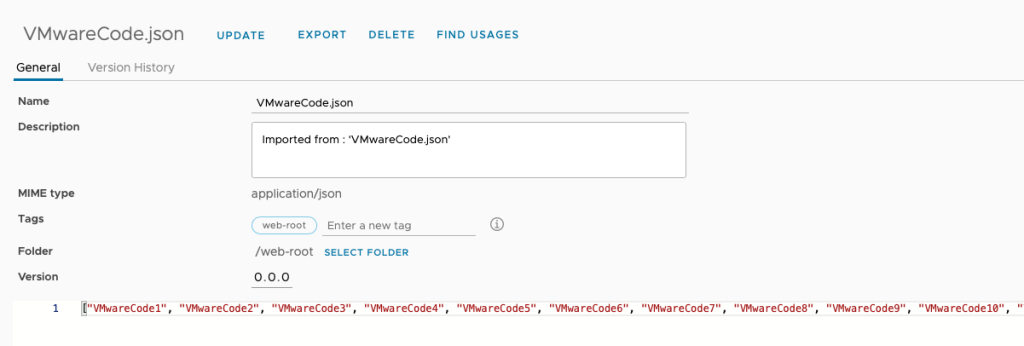
You will see Resource element by Name VMwareCode.json.
Note: Do not modify the name of resource element because it is being used at multiple places ,Once prefix is defined , do not change the value in future. if you want to change then update in configuration element and then run the CreateRE workflow again.
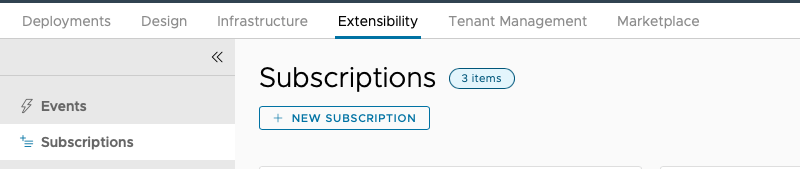
VRO part is done here , Now we need to create subscription to map other workflow so whenever we provision the machine, we will get VM names from there.
Click on Extensibility and click New Subscription.
Provide any meaningful name in Name section
Enable the subscription.
Event Topic = > Choose Compute allocation.

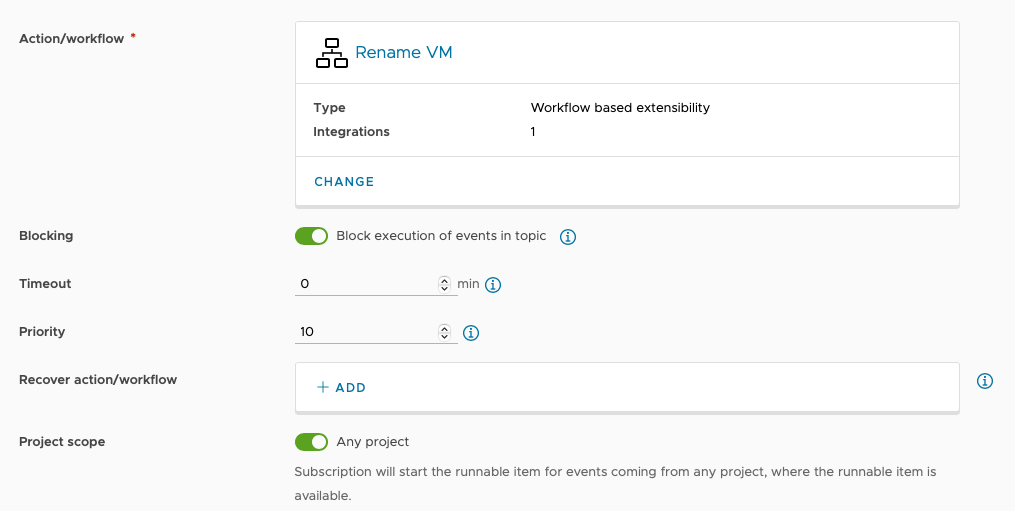
In the Action/Workflow choose the Rename VM workflow under vRO , enable Blocking and Click Save.
Click on New Subscription Once again and Provide any meaningful Name , for event Topic choose post Removal .
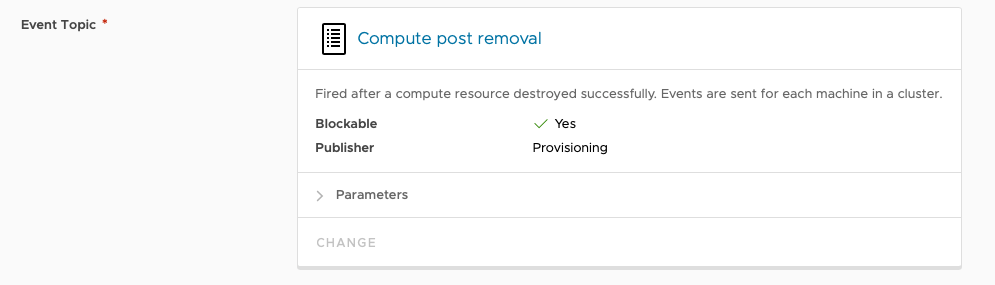
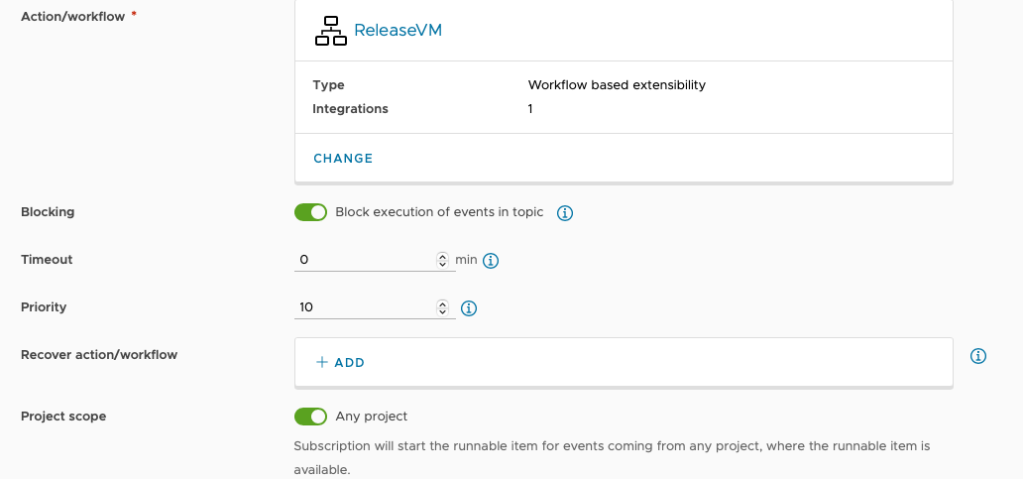
On workflow choose the workflow by name ReleaseVM and Enable Blocking and Click Save.
Now subscriptions are configured lets test the Blueprint with provisioning.
Here is my base Yaml nothing fancy.
formatVersion: 1
inputs: {}
resources:
  Cloud_Network_1:
    type: Cloud.Network
    properties:
      constraints:
        - tag: 'vsphere:network'
      networkType: existing
  Cloud_vSphere_Machine_1:
    type: Cloud.vSphere.Machine
    properties:
      image: Images
      count: 2
      cpuCount: 1
      totalMemoryMB: 1024
      awaitIp: false
      customizeGuestOs: false
      storage:
        constraints:
          - tag: 'vsphere:ds'
      constraints:
        - tag: 'vsphere:cluster'
      networks:
        - network: '${resource.Cloud_Network_1.id}'
As we see count value is 2 here .
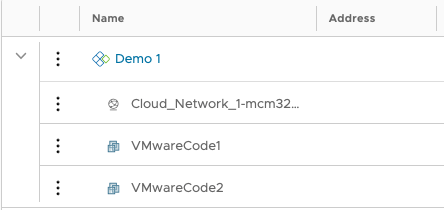
Once we provision It will look like this.
Here is the workflow Output.
Let’s say we do not need this deployment or VMs , Lets delete them and see what will happen.
Since we have 2 VMs ,ReleaseVM workflow will trigger twice .

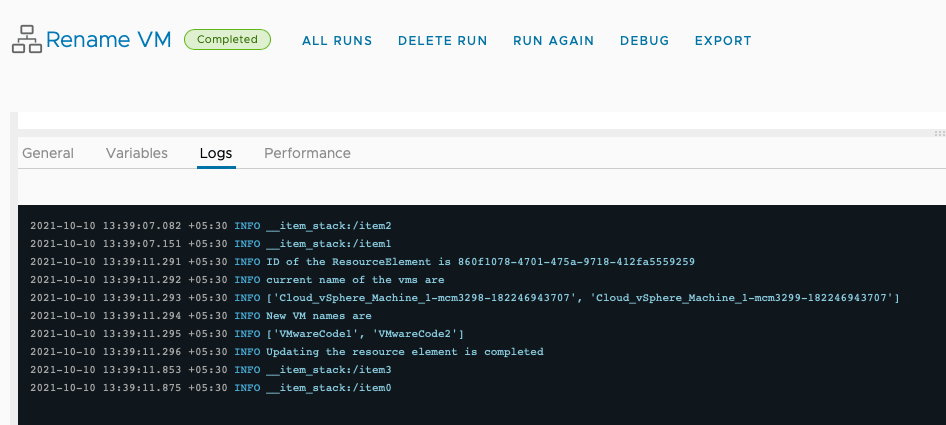
Here is the Output of both Runs.
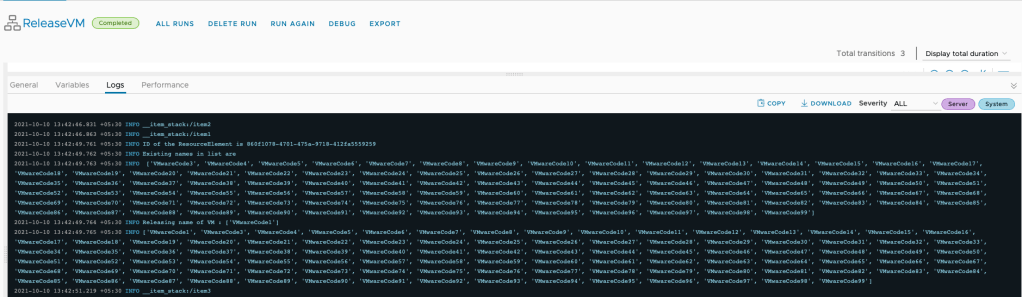
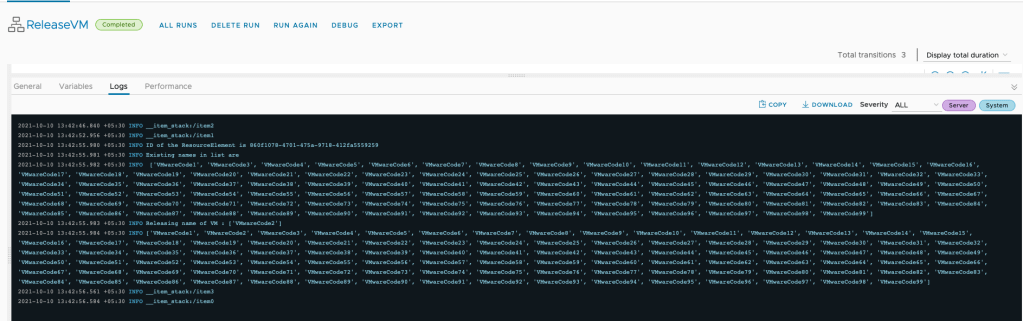
Workflow will do the sorting of the names automatically and deleted names can be re used also.
Disclaimer:
If vRO is not healthy , these workflow will get completed even with errors , Because we need to release the locks , But we need to check the logs and make sure vRO is up and running .
This solution is entirely based upon API and For the API to work vRO should be up and running.
Incase VRO is not healthy ReleaseVM workflow may give error , you can check workflow logs , make sure you provide right credentials which has permission to perform the job.
